Key Takeaways
A failed engine does not automatically mean the vehicle belongs in a scrapyard. A careful diagnosis, realistic budget, compatible replacement, and disciplined follow-up can help you get back on the road with a new engine without turning the job into a costly guess.
- Confirm the failure with a proper inspection before authorizing replacement.
- Compare repair, rebuilding, used, remanufactured, and new-engine costs.
- Match the replacement to the vehicle’s engine, transmission, and electronics.
- Get labor, parts, warranty terms, and possible extra costs in writing.
- Break in the engine gently and follow a consistent maintenance schedule.
Determine whether a new engine is the right solution
Engine replacement is a major decision, but it is not always the most expensive or sensible path. A vehicle with a sound body, dependable transmission, and a history you understand may be worth saving. Before committing, separate confirmed mechanical damage from symptoms that could come from a smaller, repairable problem.
A trustworthy diagnosis should explain what failed, how the shop tested it, and what other systems may have been affected. It should also account for the vehicle as a whole rather than focusing only on the engine. That broader view is the starting point for deciding whether replacement will genuinely help you get back on the road with a new engine.
Signs your current engine may be beyond repair
Severe internal damage is more concerning than an isolated gasket, sensor, belt, or accessory failure. A loud knocking sound, very low compression, metal in the oil, heavy smoke, persistent overheating, or an engine that will not rotate can all justify deeper testing. None of those signs, by itself, proves that replacement is required, so avoid approving a large job based only on a noise or warning light.
Ask for the test results behind the diagnosis. Compression and leak-down checks, oil-pressure readings, cooling-system tests, and a scan of the vehicle’s fault codes can help establish whether the problem is internal or external. The useful question is not simply whether the engine sounds bad; it is whether the damaged components can be repaired at a reasonable cost and with dependable results.
Comparing engine replacement, rebuilding, and repair
A repair targets a particular fault while leaving most of the existing engine in place. Rebuilding usually means disassembling the engine, inspecting its major components, replacing worn parts, and restoring it to an agreed standard. Replacement removes the failed unit and installs another engine, which may reduce downtime but still requires careful compatibility checks and related work.
The right choice depends on damage, parts availability, labor rates, and the quality of the available replacement. A repair can be sensible when the block and crankshaft are sound. Rebuilding may suit a vehicle with a desirable configuration or a hard-to-find engine. Replacement often makes more sense when internal damage is extensive or a properly warranted unit is readily available.
Evaluating your vehicle’s age, mileage, and condition
The engine is only one part of the ownership decision. Inspect the transmission, suspension, steering, brakes, air-conditioning system, electrical equipment, tires, and body structure before investing. A clean, well-maintained vehicle with manageable mileage can justify a replacement more readily than one with rust, deferred safety work, and several unrelated failures waiting nearby.
Maintenance history matters as much as the odometer. Records can show whether the cooling system, timing components, fluids, and transmission have received regular attention. They also help a shop identify the likely cause of the failure, which reduces the risk of installing another engine and repeating the same problem.
Calculating the total cost versus the car’s value
Start with a complete estimate rather than the engine price alone. Include diagnosis, removal and installation, fluids, filters, gaskets, belts, hoses, taxes, shop supplies, towing, and any programming or calibration. Then compare that figure with the vehicle’s present condition and the cost of finding another car that is safe, inspected, and likely to need less immediate work.
The comparison should not rely on resale value alone. A familiar vehicle with a solid maintenance record may provide more practical value than an unfamiliar replacement at a similar price. Leave room for a sensible contingency because hidden damage, seized fasteners, corroded wiring, and worn supporting parts may not become visible until the old engine is removed.
Choose the right replacement engine
Replacement engines are not interchangeable simply because they share a brand name or appear similar. Small differences in displacement, emissions equipment, sensors, wiring, intake and exhaust layouts, and control modules can affect whether an installation works correctly. Gather the vehicle identification number, model year, engine code, transmission type, and emissions information before requesting prices.
A reputable supplier or repair shop should be able to explain exactly what is being offered and what it includes. Ask whether the quoted unit comes complete or requires parts from the original engine. Compare the warranty in practical terms, including who pays shipping, what labor is covered, and what maintenance must be documented.
New, remanufactured, rebuilt, and used engine options
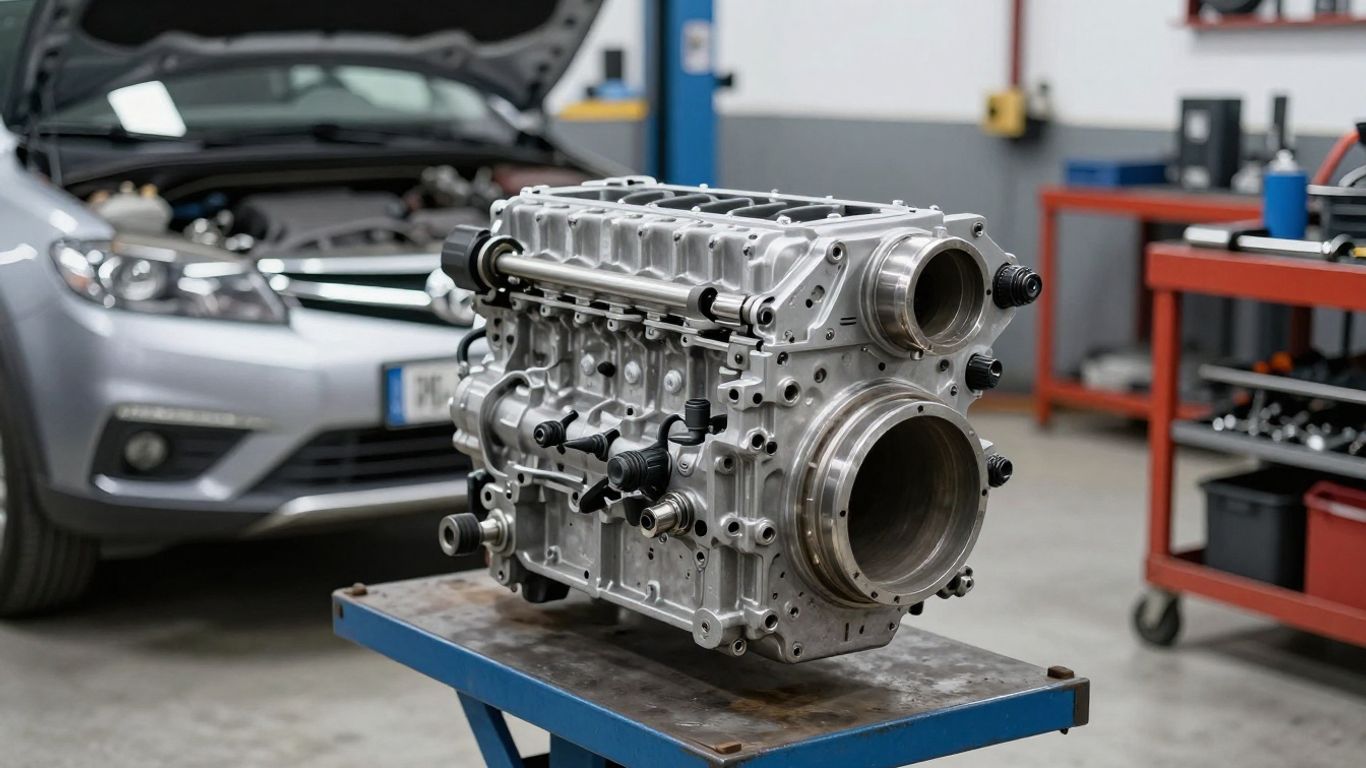
A genuinely new engine is built from new components, although the exact contents of the assembly should still be confirmed. A remanufactured engine has been professionally restored and tested according to a defined process. A rebuilt engine may have selected worn parts replaced, but the scope of that work can vary. A used engine is removed from another vehicle and may offer a lower initial price, with more uncertainty about its history.
The label matters less than the documentation behind it. Ask what was measured, machined, replaced, tested, and included in the price. A less expensive unit may cease to be a bargain if it arrives incomplete, carries a short warranty, or requires extensive transfer of old components.
Matching the engine to your vehicle’s specifications
Use the vehicle identification number and the engine’s identifying code rather than relying on year and model alone. Confirm displacement, fuel system, emissions configuration, drive layout, accessory arrangement, and sensor locations. Even a small specification mismatch can create installation delays, drivability issues, or an unexpected need for additional parts.
Have the shop compare the replacement unit with the original before installation. Photographs, casting numbers, connector locations, and included components can reveal differences early. Written confirmation of compatibility is useful if the engine is being shipped from elsewhere or ordered before the vehicle reaches the shop.
Reviewing warranties, mileage, and supplier reputation
A warranty should tell you how long coverage lasts, whether it is measured in time or miles, and which parts are included. Some warranties cover the replacement unit but not diagnosis, removal, fluids, towing, or labor. Ask what maintenance records are required and what happens if a covered problem appears after the vehicle has been driven.
Mileage is especially relevant for a used engine, but it is not a complete measure of condition. A documented inspection, compression information, operating history, and clear return process may be more useful than a low mileage claim with no supporting records. Check whether the supplier communicates clearly and provides a written description of the unit before payment.
Confirming compatibility with the transmission and electronics
The engine must work with the vehicle’s transmission, engine computer, wiring harness, immobilizer, sensors, and emissions controls. Confirm whether the original accessories, mounts, intake, exhaust, fuel system, and control modules will transfer. The shop should also explain whether software updates, relearning procedures, or diagnostic checks are expected after installation.
Do not treat a physically fitting engine as a fully compatible engine. A mismatch may leave the vehicle unable to start, unable to communicate with its modules, or unable to meet emissions requirements. Clarifying those details before removal protects both the budget and the schedule.
Plan for the engine replacement process
Good planning makes a complicated repair easier to manage. The work commonly involves diagnosis, draining fluids, removing the failed engine, transferring or replacing components, installing the replacement, reconnecting systems, filling fluids, and performing inspections and tests. The exact sequence varies by vehicle and by the condition of the parts that come out.
Ask the shop to describe its process in plain language. You should know what has already been confirmed, what remains uncertain, and when the shop will contact you for approval. That conversation helps prevent a low initial quote from becoming an unexpected bill with no clear decision points.
Getting an accurate inspection and written estimate
An estimate should identify the engine being supplied, the labor operation, included parts, expected fluids, taxes, shop charges, and exclusions. It should also state whether the estimate is fixed or subject to change after disassembly. If additional damage is discovered, the shop should pause and obtain your approval before performing work outside the agreed scope.
Request diagnostic findings in addition to the price. A written explanation of the failure gives you something to compare when reviewing other estimates and may reveal whether the original cooling, lubrication, or maintenance problem must be corrected. A clear paper trail protects both sides when the job becomes more complicated than expected.
Understanding how long engine replacement takes
The calendar time depends on the vehicle, engine availability, shop workload, rust, access, and the number of components that must be transferred. The physical removal and installation may take far less time than sourcing the correct engine or resolving a wiring, emissions, or programming issue. A shop that gives a range and explains its assumptions is usually more useful than one that promises an exact completion time without inspecting the vehicle.
Ask when parts will be ordered, when the old engine will be removed, and when testing is expected to begin. Also ask how delays will be communicated. A realistic schedule lets you arrange transportation without pressuring the shop to skip inspections at the end of the job.
Identifying related parts that may need replacement
The failed engine may have damaged or contaminated nearby components, and some items are simply easier to replace while access is available. The final decision should follow inspection, but common areas to review include the cooling system, belts, hoses, mounts, seals, filters, and ignition or fuel components. The shop should distinguish necessary repairs from convenient upgrades.
A useful review separates immediate reliability work from optional improvements. For example, a cracked hose or leaking seal deserves attention before the vehicle returns to service, while cosmetic cleaning can wait. This distinction keeps the project focused when the estimate begins to grow.
Preparing for labor, fluids, taxes, and unexpected costs
The engine’s advertised price can be only one portion of the project. Labor, freight, fluids, filters, gaskets, fasteners, diagnostic time, disposal fees, taxes, and programming can all appear on the final invoice. Ask whether the quote includes the initial oil and coolant, bleeding the cooling system, clearing codes, and the road test.
A written authorization limit gives you control over surprises. If you can set aside a contingency, base it on the vehicle’s age and the amount of corrosion or deferred maintenance found during inspection. If the extra cost exceeds that limit, pause and reassess the entire repair rather than allowing small approvals to accumulate unnoticed.
Work with a qualified repair shop
The shop matters almost as much as the replacement unit. Engine installation requires lifting equipment, correct procedures, diagnostic ability, and careful attention to details that may not be visible once the vehicle is reassembled. Choose a business that is willing to explain the job, document the parts, and discuss what happens if the result is not right.
You do not need to understand every mechanical term to evaluate professionalism. Notice whether the estimate is specific, whether questions receive direct answers, and whether the shop separates facts from assumptions. A calm, documented process is a better sign than a low verbal price that leaves major items undefined.
Questions to ask before approving the job
Before authorizing work, ask who will supply the engine, whether it is complete, and what parts will transfer from the original unit. Ask how the shop confirmed the diagnosis, what related systems will be inspected, and what tests will be performed before delivery. You should also know who will contact you if the estimate changes.
A short list can keep the conversation focused when the vehicle is already disabled:
- What exact engine code and configuration are being installed?
- Which parts, fluids, diagnostics, and tests are included in the estimate?
- What conditions would require additional approval?
- How will the warranty handle a part failure and related labor?
The answers should appear in the estimate or repair order wherever possible. Verbal reassurance may be helpful, but written terms are easier to review later and reduce misunderstandings about the scope of the work.
Checking certifications, experience, and customer reviews
Look for evidence that the shop regularly performs engine replacements on vehicles like yours. Relevant experience can matter more than a broad claim that the business repairs all makes and models. Certifications, training, equipment, and a clean, organized work area can all support confidence, though none replaces a detailed estimate.
Customer reviews are most useful when read for patterns rather than isolated praise or criticism. Pay attention to comments about communication, changes to estimates, warranty handling, and whether vehicles were returned with problems unresolved. You can also ask the shop for an explanation of its process without expecting private customer information.
Confirming parts and labor warranty coverage
Parts and labor warranties are often separate, so read both. Find out whether coverage begins on the installation date, whether mileage limits apply, and whether maintenance records are required. Ask about exclusions such as overheating, low fluid, modified systems, racing, or continued driving after a warning appears.
Clarify the procedure for a claim before you need it. Some suppliers require inspection or authorization before a unit is removed, while the installing shop may set its own labor policy. Keep the invoice, warranty document, engine identification, and service records together throughout the coverage period.
Reviewing the repair order and payment terms
The repair order should identify the vehicle, the approved work, the engine description, the estimate, and the authorization process for additional charges. Review deposits, payment methods, storage fees, core returns, and what happens if the vehicle cannot be completed on the original schedule. Ask for a copy before work begins.
When the repair is finished, the final invoice should show what was actually installed and what was charged. Walk around the vehicle with the shop, confirm that warning lights have been addressed, and ask for the break-in and maintenance instructions. Do not feel rushed into payment before you understand the completed work and any remaining recommendations.
Break in and test the new engine safely
The first drives are part of the installation, not an afterthought. A replacement engine needs to be checked for leaks, correct fluid levels, warning lights, abnormal temperatures, and proper operation under varying conditions. Follow the engine supplier’s and vehicle manufacturer’s instructions when they differ from generic advice.
Keep the first few trips close to home and allow time for careful observation. A small issue caught early may be straightforward to correct; a leak or overheating problem ignored during the first drive can cause serious damage. Record the mileage and any symptoms so the shop has useful information at follow-up.
Following the manufacturer’s break-in recommendations
Break-in instructions vary by engine type and supplier, so obtain them in writing. They may specify an initial oil change, limits on engine speed or load, varied driving conditions, and a particular inspection interval. Do not substitute an internet routine for instructions that came with the unit.
If no clear instructions are provided, ask the installing shop what procedure it supports and why. Avoid extended idling, heavy loads, towing, or aggressive acceleration until the engine has passed its initial checks. The safest approach is a controlled period of normal, moderate driving followed by the required inspection.
Checking fluid levels, leaks, and warning lights
Before starting, inspect the oil and coolant levels and look beneath the vehicle for fresh fluid. After the engine reaches operating temperature, check again for leaks around hoses, seals, filters, the oil pan, and connections. Watch the temperature gauge and stop driving if a warning light, rising temperature, loss of power, or unusual smell appears.
A road test should include more than listening for a smooth idle. Confirm that the vehicle starts reliably, accelerates normally, shifts properly, and does not show warning lights. A diagnostic scan after the test can identify stored or pending faults that are not obvious from the driver’s seat.
Driving gently during the first few hundred miles
Use varied speeds and moderate engine load rather than holding one speed for a long trip. Avoid abrupt acceleration, high engine speeds, heavy towing, and long periods of idling until the recommended break-in period is complete. Let the engine warm normally, but do not assume that a warm gauge means every component is ready for severe use.
Pay attention to changes in sound, smell, temperature, oil level, and drivability. Fuel economy may fluctuate while the engine and vehicle systems adapt, but a sharp decline or persistent roughness deserves attention. If something feels wrong, stopping early is cheaper than testing how long the problem will last.
Scheduling follow-up inspections and maintenance
Confirm when the first post-installation inspection and oil change should occur. The shop may want to recheck fluid levels, fasteners, belts, mounts, fault codes, and leaks after the vehicle has been driven. Keep every receipt and note the mileage because the records may support a warranty claim and establish the new maintenance baseline.
A follow-up appointment is also a chance to discuss minor observations. A faint smell after the first drive, a small level change, or a new vibration may have an ordinary explanation, but it should be documented and evaluated rather than dismissed. Early communication gives the shop the best chance to correct an issue promptly.
Keep your vehicle reliable after installation
A replacement engine does not erase the age or mileage of the rest of the vehicle. The transmission, cooling system, electrical components, suspension, and brakes continue to operate with their existing history. Treat the installation as a fresh starting point for records, not as a reason to postpone routine service.
Use the vehicle’s maintenance schedule as a base, then adjust it for driving conditions, climate, towing, short trips, and the engine supplier’s requirements. Consistent care is less dramatic than the replacement itself, but it has the greatest influence on whether the investment remains worthwhile.
Creating a maintenance schedule for the replacement engine
Write down the installation date, engine mileage if supplied, vehicle mileage, oil specification, filter type, warranty requirements, and first inspection date. Set reminders for oil changes, coolant checks, belt inspections, air-filter service, and the vehicle’s other scheduled maintenance. Keep engine records with the vehicle rather than relying on memory.
The replacement unit may have a different service recommendation from the rest of the car. Follow the stricter requirement when the instructions are not identical, and ask the shop to explain any conflict. A simple log can reveal gradual oil consumption or repeated temperature changes before they become larger failures.
Using the correct oil, filters, and replacement fluids
Use the oil viscosity and performance specification listed for the engine and vehicle. The same applies to coolant, transmission fluid, brake fluid, and other service products; similar colors or general-purpose labels do not guarantee compatibility. Replace filters at the recommended intervals and inspect them when diagnosing an unusual engine symptom.
Avoid adding treatments or changing fluid types without a clear reason. Extra products can complicate diagnosis and may conflict with supplier warranty terms. If the engine has a special break-in oil or initial service requirement, follow that instruction exactly and retain proof of the service.
Monitoring performance, fuel economy, and unusual noises
You know how the vehicle behaved before the replacement, so changes are worth recording. Track starting, idle quality, acceleration, shifting, temperature, oil level, fuel economy, and any new vibration or sound. One unusual observation may not indicate failure, but a pattern gives the shop something concrete to investigate.
Do not wait for a dashboard warning if the vehicle is losing power, overheating, smoking, leaking, or using fluids quickly. Pull over safely and contact the shop or roadside assistance. Continuing to drive can turn a covered, manageable concern into damage that affects both the engine and warranty coverage.
Protecting the engine with timely preventive service
Preventive service includes more than oil changes. Keep the cooling system clean and properly filled, replace aging hoses and belts, maintain the air and fuel systems, and address warning lights promptly. Correcting a small leak or weak component early helps prevent the original engine failure from being repeated.
Regular inspections also protect the vehicle around the engine. Check mounts, wiring, grounds, exhaust connections, and transmission behavior as part of routine service. With accurate records and timely attention, the replacement becomes a dependable part of the car rather than a repair that is simply waiting for its next problem.
Conclusion
The best way to get back on the road with a new engine is to make the decision methodically: verify the failure, compare the full costs, choose a documented and compatible unit, approve clear written terms, and treat break-in and maintenance as part of the installation. A careful process cannot remove every risk, but it can make the repair easier to understand, easier to manage, and more likely to serve the vehicle well for years to come.