

Key Takeaways
A successful engine replacement depends on accurate identification, realistic costing, and careful installation. Treat the replacement as a complete mechanical project rather than simply buying a motor.
- Confirm the engine code, displacement, model year, and transmission before ordering.
- Compare repair, used, reconditioned, rebuilt, and new-engine options on total cost.
- Inspect the replacement motor and verify its warranty, return terms, and included parts.
- Replace accessible supporting components while the engine is out of the vehicle.
- Monitor fluids, temperatures, warning lights, and leaks closely after installation.
Understanding when your Triton needs a replacement motor
An engine that runs poorly does not always need to be replaced. Some symptoms come from fuel, cooling, electrical, or turbocharger problems that may be repairable without removing the motor. A proper diagnosis should come before any major purchase, especially when the vehicle is still usable.
Common symptoms of severe engine failure
Severe internal damage often announces itself through persistent symptoms rather than one isolated fault. Heavy knocking, low oil pressure, repeated overheating, coolant entering the oil, or thick smoke can all justify deeper investigation. Metal in the oil, severe blow-by, low compression, and a seized crankshaft are stronger indications that the engine may be beyond an economical repair.
A warning light alone is not proof of mechanical failure. Scan results should be paired with compression or leak-down testing, cooling-system checks, oil-pressure testing, and a careful inspection for external leaks. This prevents an inexpensive sensor or hose problem from being mistaken for a failed engine.
Repairing the original engine versus replacing it
Repairing the original motor can make sense when the block, crankshaft, and cylinder head are serviceable. A rebuild may allow the workshop to retain known-compatible components and address the specific cause of failure. It can also be easier to document because the technician is working with the vehicle’s existing configuration.
Replacement becomes more attractive when several major components are damaged, machining costs are high, or the engine has a history of repeated failures. Compare the complete repair estimate with the delivered, installed, and tested cost of a replacement motor. The cheaper part on its own is not necessarily the cheaper project.
How mileage, maintenance history, and usage affect the decision
Mileage is useful context, but it should not decide the purchase by itself. A high-mileage vehicle with consistent oil changes and mostly steady highway use may be in better condition than a lower-mileage work vehicle that spent years towing, idling, or operating in dust and heat. Maintenance records, oil consumption, cooling history, and previous repairs give the mileage meaning.
Consider the vehicle’s future role as well. A daily commuter may justify a different level of investment than a work truck carrying heavy loads or traveling far from repair facilities. If the chassis, transmission, suspension, and body are also worn, an engine replacement may not be the best overall use of the budget.
Checks to complete before approving an engine replacement
Before authorizing the job, ask for the diagnostic evidence and a written scope of work. The workshop should identify the failed components, explain why replacement is preferable, and state what is included in the estimate. A written scope prevents surprises when additional parts are found during removal.
Useful checks include:
- Confirming oil pressure, compression, and coolant-system condition.
- Inspecting the turbocharger, fuel system, wiring, and engine mounts.
- Checking transmission, clutch or flexplate, cooling, and exhaust condition.
- Comparing the vehicle’s overall value with the completed repair cost.
After these checks, request the engine’s identification details and a list of parts that will be transferred. That information becomes the basis for sourcing a compatible replacement rather than relying on a broad model description.
Choosing the right Mitsubishi Triton replacement motor
A Mitsubishi Triton replacement motor must match more than the vehicle badge. Engine codes, production years, emissions equipment, sensors, mounts, and transmission interfaces can vary within the same generation. The safest purchase starts with the vehicle identification number, the original engine label, and photographs of the existing installation.
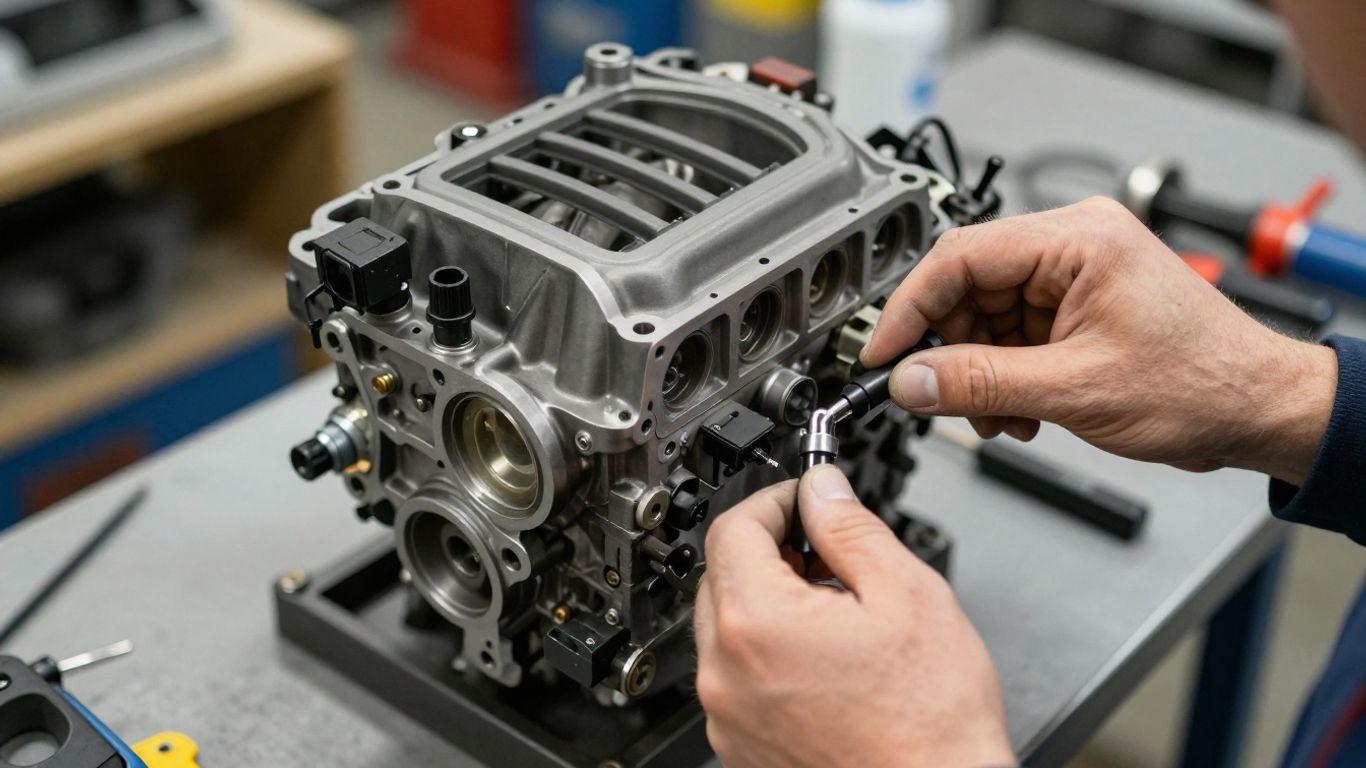
The goal is not merely to find an engine that physically fits. It must also work with the vehicle’s control systems and retain the equipment needed for legal, reliable operation. Confirm these details before paying a deposit or arranging freight.
Matching the engine code, displacement, and model year
Record the exact engine code and displacement from the vehicle, then compare them with the supplier’s identification information. Model-year ranges in advertisements can be broad, while changes to sensors, manifolds, mounts, or control modules may occur within that range. Photographs and casting or serial details can help resolve uncertainty, but they should support—not replace—written confirmation.
Ask whether the quoted unit is a complete engine, a long block, or a short block. Those descriptions determine which original parts must be transferred and which components are absent. A long block may include the cylinder head and lower assembly while excluding accessories, intake equipment, fuel components, or the turbocharger.
Comparing used, reconditioned, rebuilt, and new engines
Each category carries a different balance of price, evidence, and risk. A used engine may be economical when its donor history and testing are clear. A reconditioned or rebuilt unit may include renewed wear components, but the exact work should be documented rather than assumed from the label.
A new engine or new long block usually offers the clearest starting point, although compatibility and transferred components still matter. Compare the scope of work, testing, warranty, and expected installation requirements—not just the word “new” in the listing.
Accounting for manual and automatic transmission differences
The engine may differ according to the transmission fitted to the vehicle. Check the flywheel, flexplate, clutch arrangement, starter position, crankshaft configuration, bellhousing interface, and any brackets or sensors attached to the original motor. A replacement can be mechanically sound yet unsuitable if these details are overlooked.
Have the installer compare the old and replacement engines before final assembly. If a component must be transferred, identify it in the quote and confirm its condition. This is also the right time to decide whether a worn clutch, rear main seal, or related hardware should be renewed.
Verifying emissions, electronics, and equipment compatibility
Electronic compatibility is as important as physical fit. Compare injectors, sensors, wiring connectors, throttle or accelerator interfaces, exhaust equipment, intake parts, and engine-control requirements. Differences can create fault codes, starting problems, poor running, or emissions issues after installation.
The supplier should state which components are included and which are expected to come from the original vehicle. Do not assume that an engine from a similar model has identical electronics. A compatibility check using the vehicle identification number and clear component photographs can prevent an expensive mismatch.
Comparing replacement motor costs
The purchase price is only one part of the budget. Removal, preparation, transferred accessories, fluids, seals, programming, freight, and testing can all affect the final amount. A useful estimate separates the engine itself from the work required to make it operate correctly in the vehicle.
Get comparable quotes using the same description of the engine and the same installation assumptions. Otherwise, a low initial figure may simply exclude tasks that another workshop has included. Allow a contingency for hidden damage discovered after removal, but ask that any additional work be approved before it begins.
What influences the price of the engine itself
Price reflects condition, mileage evidence, testing, included accessories, availability, and warranty terms. A bare assembly may look inexpensive because the turbocharger, fuel equipment, alternator, sensors, manifolds, and brackets are absent. A more complete unit can cost more upfront while reducing transfer labor and uncertainty.
Location and freight also matter, particularly for a heavy engine. Ask whether the price includes packaging, delivery, taxes or fees where applicable, and any required core return. Compare like with like so that the decision is based on total delivered value.
Labor, fluids, seals, and installation-related expenses
Labor depends on vehicle condition, workshop access, engine configuration, and how many parts must be transferred. The estimate should account for removal, cleaning, inspection, assembly, installation, fluid replacement, bleeding, programming, and road testing. It should also identify whether diagnostic time is included.
Common installation-related items include:
- Engine oil, coolant, filters, belts, hoses, and replacement gaskets.
- Seals, mounts, fasteners, clamps, and other single-use hardware.
- Clutch or flexplate parts, depending on the transmission and condition.
- Freight, disposal, core handling, and post-installation diagnostic checks.
These items are not automatically required in every job, but they should be considered before the budget is approved. A detailed estimate makes it easier to distinguish necessary preventative work from optional upgrades.
Extra costs for turbochargers, fuel systems, and accessories
Accessories transferred from a failed engine may be the reason the original motor failed. A contaminated fuel system, damaged turbocharger, blocked intake, or overheated cooling system can quickly damage the replacement if it is reused without testing. Inspect the cause of failure, not just the failed long block.
The quote should state whether accessories are tested, repaired, replaced, or transferred as-is. If the replacement engine is supplied without them, include the labor needed to clean and install the original components. That detail often explains a large difference between two otherwise similar quotes.
How to evaluate warranties and avoid misleading low quotes
Read the warranty before comparing prices. Check its duration, covered parts, installation requirements, exclusions, claim process, and whether labor or freight is included. Some warranties require professional installation, documented fluids, or prompt reporting of a fault.
A low quote deserves questions rather than automatic rejection. Ask for the engine condition, test evidence, included components, delivery terms, and the cost of likely extras. The most useful comparison is a written total with assumptions clearly shown, not a single headline number.
Finding and inspecting a suitable replacement engine
Sourcing requires patience because listings can use broad descriptions for engines that are not interchangeable. Specialist dismantlers, reconditioning workshops, engine suppliers, and established vehicle-parts marketplaces may all have suitable options. The seller’s ability to identify, test, package, and support the motor matters as much as the asking price.
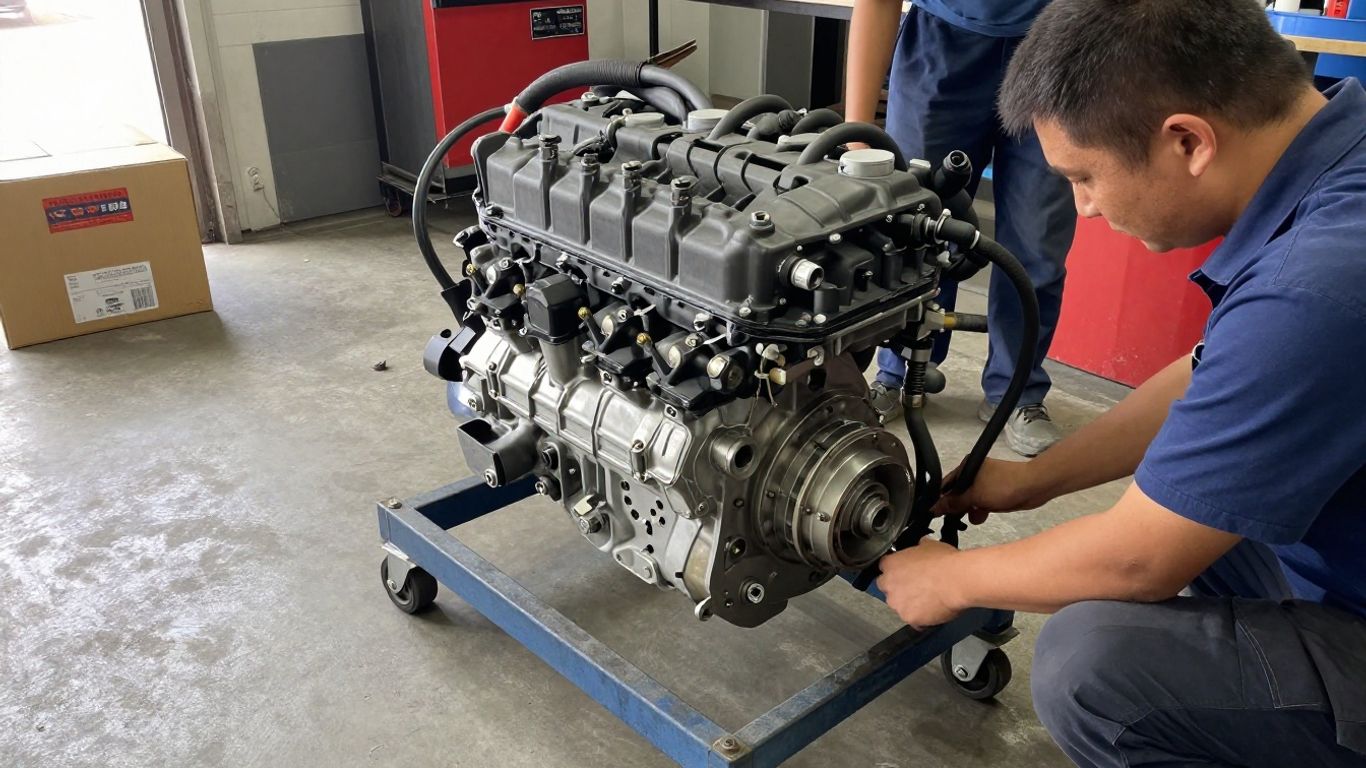
Whenever possible, exchange the vehicle identification number, original engine code, transmission type, and photographs before receiving a quote. A seller who asks precise questions is more likely to understand the fitment issue than one who relies only on a model name.
Where to source used and reconditioned Triton engines
Look for suppliers that provide a traceable stock number, donor details, test information, and written terms. A dismantler may know the vehicle’s mileage and operating history, while a reconditioning workshop may document the machining or replacement work performed. Neither description is enough without supporting records.
Ask whether the engine is available as a complete assembly or only as a long block. Clarify how it will be protected for transport and whether the seller can supply photographs of the actual unit. Stock images and generic descriptions should not be treated as proof of the motor being offered.
Reviewing donor-vehicle history and service records
Donor information can reveal how the engine was used and why the vehicle was dismantled. Check recorded mileage, accident or flood exposure, maintenance intervals, overheating events, and the reason for removal. Service records are especially useful when they show regular oil and filter changes.
The absence of records does not automatically make an engine unusable, but it increases the value of independent testing and a strong return policy. Ask direct questions and keep the answers with the invoice. Written documentation is much more useful than a casual assurance made during a phone call.
Checking compression, leaks, corrosion, and visible damage
Inspection should cover the block, head, covers, mounts, threaded holes, connectors, and sealing surfaces. Look for oil or coolant staining, corrosion, cracked housings, damaged threads, bent brackets, and signs of impact. If the engine can be tested, request compression results and information about oil pressure, leaks, and abnormal noise.
A visual check cannot reveal every internal problem, so match it with the warranty and the seller’s test procedure. Photograph the engine when it arrives, including packaging and identifying marks. This creates a record if damage or a discrepancy is found before installation.
Confirming the warranty, return policy, and included components
Before purchase, obtain a written list of what comes with the engine and what must be transferred. Confirm the warranty start date, claim procedure, installation conditions, and return period. Also ask who pays for inspection, removal, shipping, and labor if the unit proves incompatible or defective.
Have the workshop inspect the delivered engine before fitting it. If the identification or condition differs from the agreement, pause the installation and contact the seller. Installing first can make it harder to establish whether a problem existed before the motor was fitted.
Planning the replacement motor installation
Good planning reduces the time the vehicle spends in the workshop and limits avoidable rework. Before removal, document hose routing, wiring connections, brackets, and accessory positions with photographs. Label parts as they come off, especially when several connectors or vacuum lines look similar.
The installer should review the replacement engine against the original before the old motor is discarded. That comparison can identify missing brackets, incompatible sensors, or damaged transfer parts while the project is still easy to adjust. It also creates a clear boundary between the engine purchase and installation work.
Deciding which original components should be transferred
Some replacement motors arrive without the accessories needed for a complete installation. Compare the condition of the original turbocharger, injectors, fuel rail or pump components, alternator, starter, manifolds, sensors, brackets, and wiring. Transfer only parts that have been inspected and confirmed compatible.
The cause of the original failure should guide this decision. Reusing a contaminated fuel component or a turbocharger with excessive shaft play can put the replacement motor at risk. Make each transfer decision visible in the estimate so there is no confusion about what the workshop is responsible for testing.
Replacing supporting parts while the engine is accessible
Engine removal provides access to parts that may otherwise be expensive or difficult to reach. Depending on condition, the workshop may recommend renewing seals, belts, hoses, filters, mounts, coolant components, clutch hardware, or fasteners. These are not universal requirements, so the decision should follow inspection rather than a blanket parts list.
Preventative work is most valuable when it addresses known wear or the cause of failure. Ask the technician to separate required repairs from sensible optional replacements. That keeps the budget controlled while avoiding the false economy of reinstalling a clearly damaged component.
Managing ECU programming, wiring, and immobilizer requirements
Some installations need electronic checks or programming after the mechanical work is complete. The installer should verify connector compatibility, sensor signals, control-module communication, immobilizer behavior, and stored fault codes. The exact procedure depends on the vehicle configuration and the components retained from the original engine.
Plan this work before the engine arrives. Confirm that the workshop has the necessary diagnostic equipment and understands which control modules may need to be paired or reset. If the motor cranks but does not start, an electronic compatibility check should be part of the diagnosis rather than an afterthought.
Scheduling professional inspections and post-installation testing
A professional inspection should cover fluid levels, hose routing, fasteners, wiring, fuel connections, exhaust joints, and engine mounts before startup. After the first run, the vehicle needs checks for leaks, abnormal noise, warning lights, temperature changes, and correct charging. A controlled road test should follow only after stationary checks are satisfactory.
Ask for the test results and any recommended follow-up interval. Keeping the installation invoice, component list, diagnostic printout, and warranty documents together will help if a problem appears later. It also gives the next technician a clear record of what was changed.
Protecting the new engine after installation
The first hours and miles after installation deserve careful attention. Even a well-prepared engine can be affected by a reused accessory, an air pocket in the cooling system, a loose connection, or an incorrect fluid level. Early observation gives small problems a chance to be corrected before they cause major damage.
Follow the installer’s instructions for startup and break-in, since the correct process depends on the type and condition of the replacement motor. Avoid treating the vehicle as fully proven until it has passed its initial checks and any required reinspection.
Completing the initial startup and break-in process
Before starting, verify oil, coolant, fuel connections, belt alignment, battery condition, and accessible fasteners. Prime the lubrication system where the engine design and workshop procedure require it, then watch oil pressure and warning lights immediately after startup. Let the technician check for leaks and abnormal sounds before increasing engine load.
The break-in approach should follow the supplier or installer guidance. Avoid unnecessary heavy loads, sustained high engine speed, and towing until the motor has completed its initial inspection period. Record the starting mileage and the dates of early fluid or filter checks.
Monitoring fluids, temperatures, warning lights, and leaks
Check the engine bay and the ground beneath the vehicle after the first drive and again once the vehicle has cooled. Watch coolant level, oil level, temperature behavior, charging voltage, smoke, and warning lights. A small change can be useful evidence, even when the vehicle still feels normal.
Do not ignore a rising temperature, oil-pressure warning, fuel odor, coolant loss, or new mechanical noise. Stop safely and contact the installer before continuing to drive. Early action may prevent a minor installation issue from becoming another engine failure.
Following a preventive maintenance schedule
Use a written service schedule based on the engine supplier’s instructions, the vehicle’s operating conditions, and the workshop’s recommendations. Keep records of oil and filter changes, cooling-system inspections, belt checks, and diagnostic work. Severe service, dust, towing, and frequent short trips may justify closer monitoring than ordinary use.
Do not assume that a replacement motor resets the maintenance needs of the whole vehicle. Transmission fluid, driveline components, cooling hardware, and electrical connections still require attention. A complete record also helps preserve warranty support when maintenance documentation is requested.
Recognizing early signs of installation or compatibility problems
Problems after installation may appear as hard starting, uneven running, unusual smoke, poor charging, overheating, new vibration, warning lights, or repeated fault codes. These symptoms can come from wiring, sensors, air or fuel supply, mounts, accessories, or software compatibility rather than the internal engine itself.
Return to the installer while the symptoms and diagnostic data are fresh. Avoid replacing parts at random or continuing to drive while a serious warning is present. A prompt, methodical inspection is usually more useful than assuming the entire replacement engine is defective.
Conclusion
Buying a Mitsubishi Triton replacement motor is a decision about compatibility, evidence, installation quality, and long-term care. Confirm the engine identity, compare complete project costs, inspect the unit before fitting, and keep the workshop and seller aligned in writing. Those steps cannot remove every risk, but they make a sound replacement far more likely to deliver dependable service.